DIY outlet covers

Thursday, August 1, 2013
Oh hey followers. 

I got the DIY itch about a week ago, and this happened. I love little details and pops of unique and fun designs. This lead me to this little crafty DIY project that is oh so simple. Outlet covers!! You can buy them online for $10 + a piece or make them for less than $1 each. 

 We haven't actually started to decorate our walls with "stuff" but I decided to be a little crafty and do something fun. With that being said, here is what you will need.

* TREATS 
(I always find an excuse to get my sugar on!! I always have to have something sweet and something chocolaty, weird I know.)
* Mod Podge
*Tissue Paper
*Scissors
*Outlets
*Plates/Plastic/Container for the mod podge

I found all of these supplies at Michael's. As you can see in the pictures I bought multiple designs and colors of tissue paper for different rooms in my house. I am only showing one design below (for my kitchen). I have yet to do the other rooms, but I did buy those other colors/designs for a reason. I'll get around to finishing. Ya know, busy life and stuff.


* Cut out tissue paper to fit your outlets. I clearly didn't learn how to cut straight lines in Kindergarten. oops. Good thing is, they don't have to be perfect.


*Put a very very thin and even layer of mod podge on the outlet cover. If you put too much, there will be a lot of wrinkles. Keep it thin and spread out. The first layer is mainly to stick the tissue paper on.


*Once the tissue paper is placed on the outlet, smooth it out and make sure it is even on all the corners and sides. Now glop on that mod podge!! The corners are a little difficult sometimes, so make sure to put a little extra around and under the corners. Putting a lot on top is totally fine. It soaks through and helps stick.


*Once they are completely covered and smoothed out, lay them on a plastic bag or something that won't harm the tissue paper, and let dry. They will look kinda funny at first, but be patient!


*Let them dry over night. Cut out the holes with scissors and then screw them back into the wall and this is your final result...


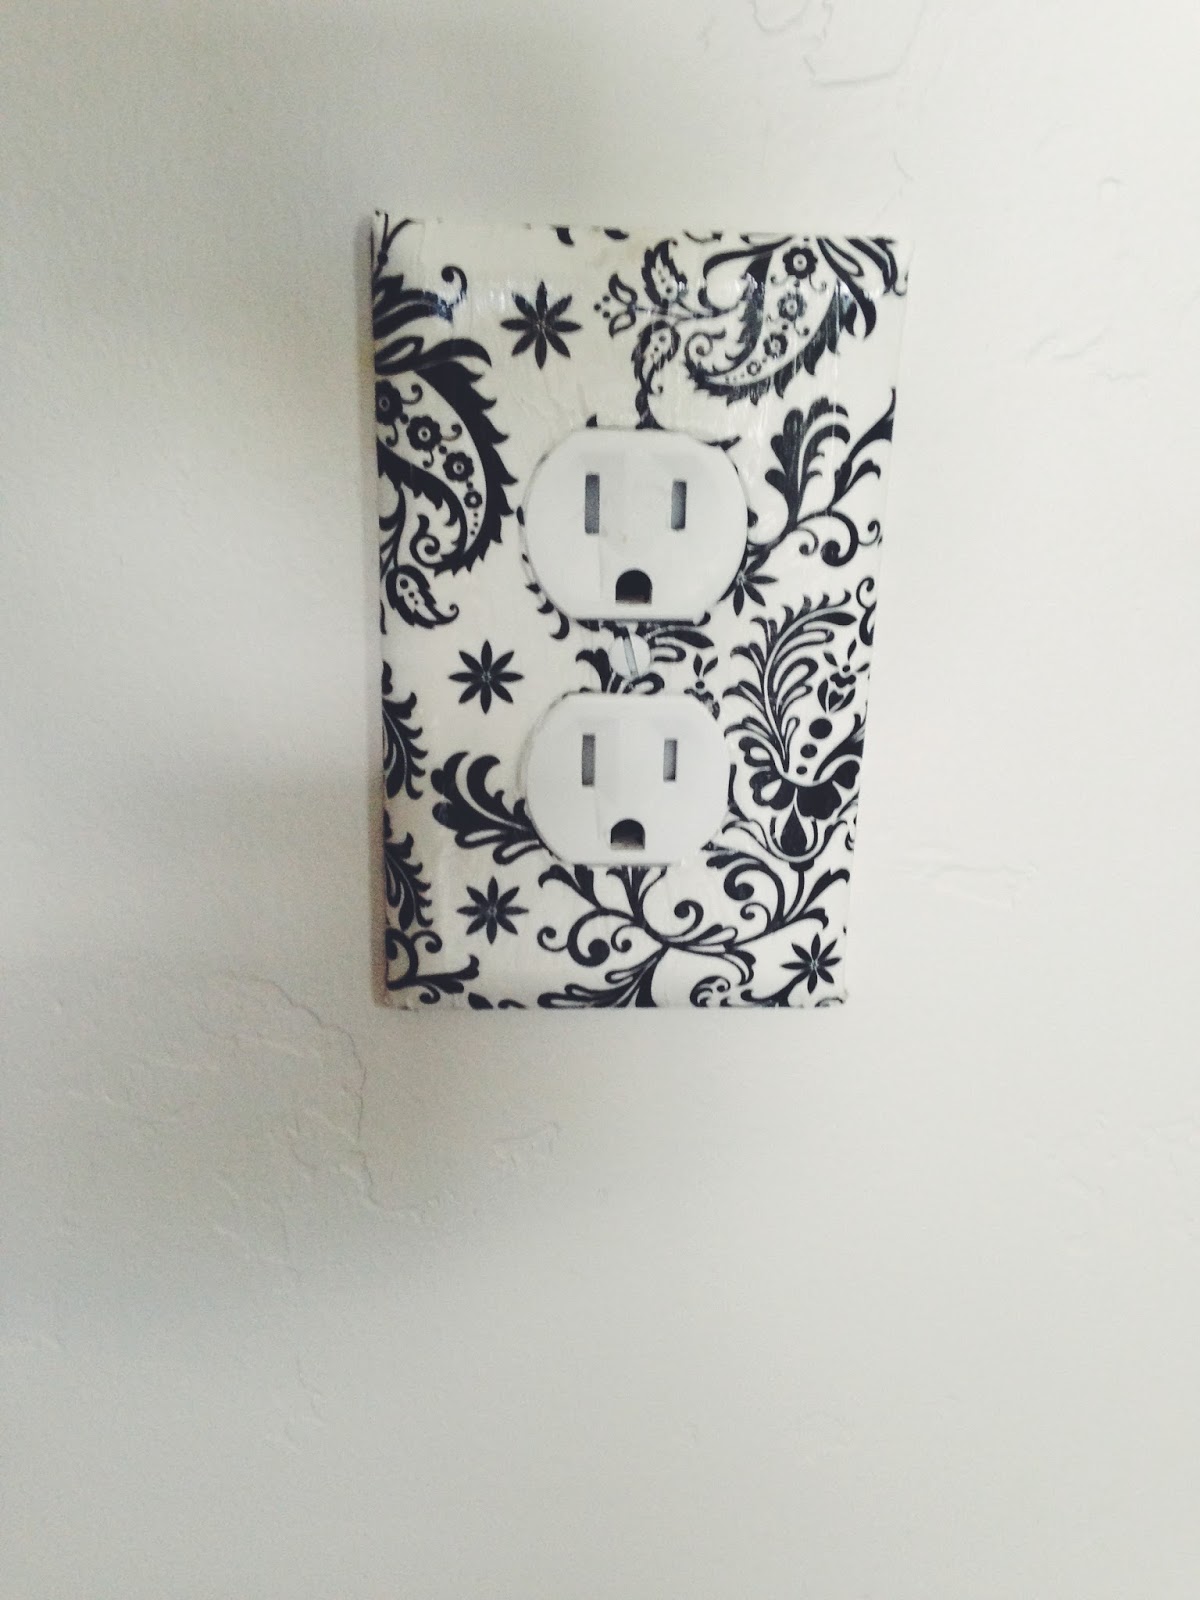
What an easy craft project!! If you decide to do this, please share your designs! I would love to see them all. 

This is a very inexpensive way to add a little life to rooms in your house. I would definitely recommend doing it. This is a project the little kids could even help with for you moms out there! Well, at least the fun messy part! :)


 photo Sig2_zps77baa8bf.jpg
8 comments on "DIY outlet covers "
var comments = []; if (data && data.feed && data.feed.entry) { for (var i = 0, entry; entry = data.feed.entry[i]; i++) { var comment = {}; // comment ID, parsed out of the original id format var id = /blog-(\d+).post-(\d+)/.exec(entry.id.$t); comment.id = id ? id[2] : null; comment.body = bodyFromEntry(entry); comment.timestamp = Date.parse(entry.published.$t) + ''; if (entry.author && entry.author.constructor === Array) { var auth = entry.author[0]; if (auth) { comment.author = { name: (auth.name ? auth.name.$t : undefined), profileUrl: (auth.uri ? auth.uri.$t : undefined), avatarUrl: (auth.gd$image ? auth.gd$image.src : undefined) }; } } if (entry.link) { if (entry.link[2]) { comment.link = comment.permalink = entry.link[2].href; } if (entry.link[3]) { var pid = /.*comments\/default\/(\d+)\?.*/.exec(entry.link[3].href); if (pid && pid[1]) { comment.parentId = pid[1]; } } } comment.deleteclass = 'item-control blog-admin'; if (entry.gd$extendedProperty) { for (var k in entry.gd$extendedProperty) { if (entry.gd$extendedProperty[k].name == 'blogger.itemClass') { comment.deleteclass += ' ' + entry.gd$extendedProperty[k].value; } else if (entry.gd$extendedProperty[k].name == 'blogger.displayTime') { comment.displayTime = entry.gd$extendedProperty[k].value; } } } comments.push(comment); } } return comments; }; var paginator = function(callback) { if (hasMore()) { var url = config.feed + '?alt=json&v=2&orderby=published&reverse=false&max-results=50'; if (cursor) { url += '&published-min=' + new Date(cursor).toISOString(); } window.bloggercomments = function(data) { var parsed = parse(data); cursor = parsed.length < 50 ? null : parseInt(parsed[parsed.length - 1].timestamp) + 1 callback(parsed); window.bloggercomments = null; } url += '&callback=bloggercomments'; var script = document.createElement('script'); script.type = 'text/javascript'; script.src = url; document.getElementsByTagName('head')[0].appendChild(script); } }; var hasMore = function() { return !!cursor; }; var getMeta = function(key, comment) { if ('iswriter' == key) { var matches = !!comment.author && comment.author.name == config.authorName && comment.author.profileUrl == config.authorUrl; return matches ? 'true' : ''; } else if ('deletelink' == key) { return config.baseUri + '/delete-comment.g?blogID=' + config.blogId + '&postID=' + comment.id; } else if ('deleteclass' == key) { return comment.deleteclass; } return ''; }; var replybox = null; var replyUrlParts = null; var replyParent = undefined; var onReply = function(commentId, domId) { if (replybox == null) { // lazily cache replybox, and adjust to suit this style: replybox = document.getElementById('comment-editor'); if (replybox != null) { replybox.height = '250px'; replybox.style.display = 'block'; replyUrlParts = replybox.src.split('#'); } } if (replybox && (commentId !== replyParent)) { document.getElementById(domId).insertBefore(document.getElementById('skyelf-comment-form'), null); replybox.src = replyUrlParts[0] + (commentId ? '&parentID=' + commentId : '') + '#' + replyUrlParts[1]; replyParent = commentId; } }; var hash = (window.location.hash || '#').substring(1); var startThread, targetComment; if (/^comment-form_/.test(hash)) { startThread = hash.substring('comment-form_'.length); } else if (/^c[0-9]+$/.test(hash)) { targetComment = hash.substring(1); } // Configure commenting API: var configJso = { 'maxDepth': config.maxThreadDepth }; var provider = { 'id': config.postId, 'data': items, 'loadNext': paginator, 'hasMore': hasMore, 'getMeta': getMeta, 'onReply': onReply, 'rendered': true, 'initComment': targetComment, 'initReplyThread': startThread, 'config': configJso, 'messages': msgs }; var render = function() { if (window.goog && window.goog.comments) { var holder = document.getElementById('comment-holder'); window.goog.comments.render(holder, provider); } }; // render now, or queue to render when library loads: if (window.goog && window.goog.comments) { render(); } else { window.goog = window.goog || {}; window.goog.comments = window.goog.comments || {}; window.goog.comments.loadQueue = window.goog.comments.loadQueue || []; window.goog.comments.loadQueue.push(render); } })(); // ]]>
  1. They are super cute! I would have never thought of it!

    xo,

    Ana Paula

    ReplyDelete
    Replies
    1. Thank you Ana!! Now you will have to do some in your house! :)

      Delete
  2. my sister did this in her house too :) cute jay!

    ReplyDelete
    Replies
    1. really? I want to see!! Where did she find her tissue paper? i want to do more designs!

      Delete
  3. So cute and easy and yet I never woulda thought! Thx for sharing!

    ReplyDelete
    Replies
    1. SO easy!!! It seriously takes like 20 min to cut and paste everything!! :)

      Delete
  4. That is so creative! It looks really pretty! I will add it to my "creative things to do in my house" list :P

    ReplyDelete
  5. This is so cool!!
    Just found your blog!
    I am now following you!!
    Looking forward to keeping up!

    xo
    Christina
    pieceitalltogetherx3.blogspot.com

    ReplyDelete